Heads Up: For the sake of transparency, this post might contain affiliate links. If a sale is made, I will receive a small commission (at no additional charge for you), which helps keep the lights on and helps feed my cats. Please read our disclosure policy for more information.
You know that feeling when you’re staring at a plate of food and have to snap a pic before taking a bite? That’s not just hunger—it’s your inner food photographer screaming to come out.
But loving food and owning a camera doesn’t automatically turn you into a pro. You take 50 shots of the same avocado toast, tweak filters for an hour, and still think, “Why doesn’t mine look like the ones on Instagram?”
The truth? How to become a food blog photographer isn’t about having the most expensive gear or a chef-level kitchen. It’s about:
- Shooting like a pro (even with your phone).
- Editing tricks that make food look good enough to lick the screen.
- Turning your hobby into real income—from brands, restaurants, and even stock photos.
In this guide, I’ll break down exactly how to go from “food pic enthusiast” to “paid photographer” without the fluff.
No vague advice—just actionable steps I’ve used (and seen work) to land gigs and grow a portfolio that attracts clients. Ready? Let’s get started.
- Gear Up Like a Pro (Or Start With What You’ve Got)
- Classic vs. AI—Should You Even Shoot Real Food Anymore?
- Learn the Secrets of Food Styling (No Fancy Degree Needed)
- Edit Like You Mean It (Without Overdoing It)
- Build a Portfolio That Gets You Hired
- Monetize Like a Boss
- "But How Do I Get My First Client?!"
- Final Say – Your First Paycheck Starts Today
These “How To Become a Food Blog Photographer” tips are worth saving! Pin this image to your Pinterest board.
Gear Up Like a Pro (Or Start With What You’ve Got)
You don’t need a $3,000 camera to start your journey on how to become a food blog photographer. Some of the most drool-worthy food pics out there? Shot on iPhones.
Phone vs. DSLR: Why Your Smartphone Might Be All You Need (For Now)
I get it. You see those glossy magazine-style food photos and assume they must have been taken with some high-end DSLR. But the thing is, your phone is way more powerful than you think.
Modern smartphones have insane cameras—portrait modes, manual controls, and editing apps that can make your tacos look like they belong in a Michelin-starred ad. The key? Lighting and angles.
- Natural light is your best friend. Shoot near a window, avoid harsh shadows, and never (ever) use your kitchen’s yellow overhead light.
- Get close, but not too close. Fill the frame with your dish, but leave a little breathing room so it doesn’t look cramped.
- Use gridlines. Turn on your camera’s grid feature to nail the rule of thirds. A well-composed burger shot beats a messy, centered one any day.
The best part? You can practice this today with whatever’s in your fridge. No fancy gear required.
Budget-Friendly Upgrades That Matter
Okay, so you’ve mastered phone photography. Now what? Before you drop cash on a DSLR, try these cheap (but game-changing) tools:
- A $5 foam board. White or black, it acts as a reflector to bounce light and kill unflattering shadows.
- Small tripod ($15-20). No more blurry shots because your hands weren’t steady.
- A spray bottle. A light mist of water makes veggies look fresh, even if they’ve been sitting out for an hour.
These tiny tweaks can make your phone shots look professional without draining your wallet.
When to Finally Invest in a DSLR
At some point, you might want to upgrade—but only when:
- Clients start asking for high-res files (some brands require them).
- You’re shooting in tricky lighting (dim restaurants, fast-moving dishes).
- You’re ready to dive into manual settings (aperture, shutter speed, ISO).
If that time comes, don’t panic. You don’t need the latest model. A used Canon Rebel or Sony a6000 can work wonders without costing a fortune.
Bottom line? Start with what you have. Master the basics. Upgrade only when your skills outgrow your gear—not the other way around.
Classic vs. AI—Should You Even Shoot Real Food Anymore?
Let’s settle this debate right now: Does AI food photography stand a chance against the real deal? The short answer? Not really—but it’s complicated.
The Timeless Way: Why Phone & DSLR Photography Still Wins
There’s a reason brands and food bloggers still hire photographers instead of just typing “perfect burger on wooden table” into an AI generator. Real food photography has soul.
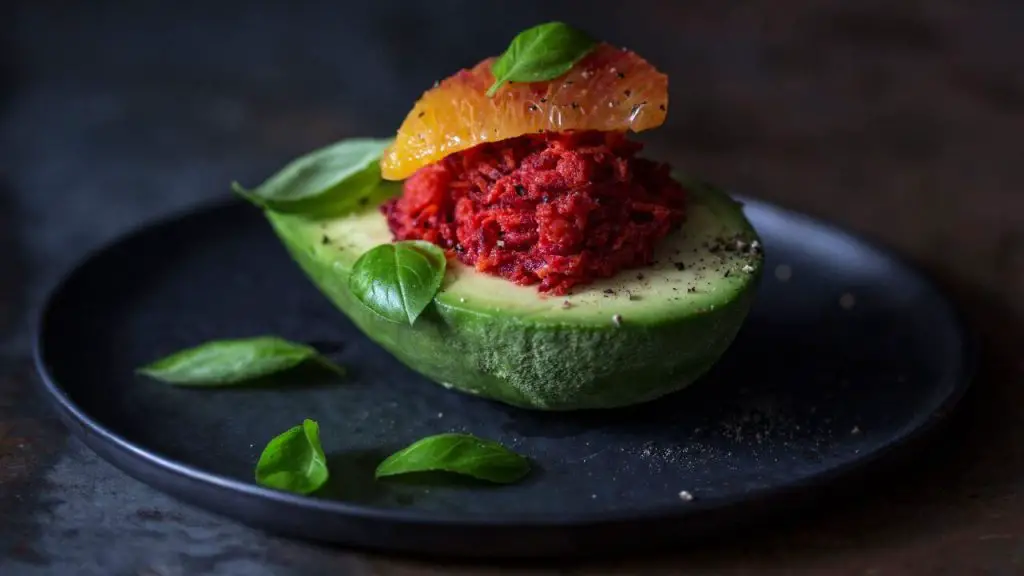
- Authenticity sells. People crave real textures—the crispy edges of fried chicken, the steam rising off soup, the gooey cheese pull. AI still can’t fake that convincingly.
- Lighting you can taste. With a phone or DSLR, you control shadows, highlights, and mood. AI images often look too perfect, like a plastic food model.
- The styling secret? Imperfection. Sprinkle crumbs, drizzle sauce unevenly, leave a bite mark. Real food has life; AI food looks staged.
Pro tip: Shoot during “golden hour” (early morning/late afternoon) near a window. Side lighting makes every dish look 10x more appetizing.
The AI Temptation: Can MidJourney or DALL·E Replace You?
Okay, let’s talk about the elephant in the room. Yes, AI-generated food pics are getting scarily good. But here’s the catch:
- Pros of AI food images:
- Fast and cheap (no ingredients, no cleanup).
- Endless creative concepts (floating donuts, rainbow sushi, etc.).
- Great for inspiration or mood boards.
- Cons of AI food images:
- Uncanny valley vibes (why does that steak look… sweaty?).
- Legal gray areas (can’t copyright AI images, and brands are wary).
- Zero versatility. Need a different angle? You regenerate and pray.
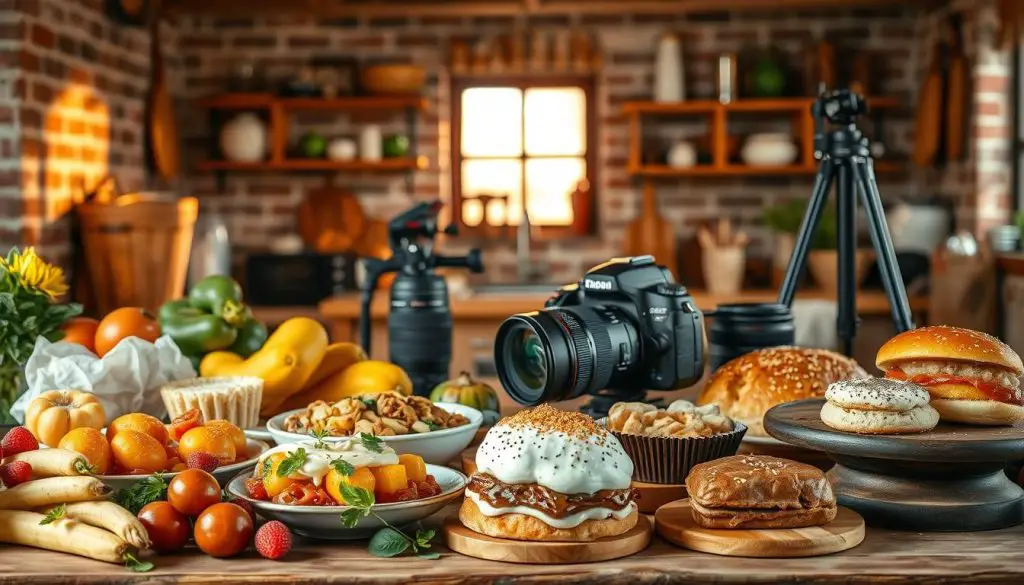
The weird truth? AI food pics work best for unrealistic concepts (think: fantasy cookbooks or surreal ads). But for local restaurant photography or blog recipe posts, nothing beats the real thing.
The Hybrid Hustle: When to Use AI With Real Shots
Smart food photographers aren’t ignoring AI—they’re using it strategically. Here’s how:
- Mockups in a pinch: Need a quick background or prop idea? Generate an AI table setting, then shoot your real dish on a similar setup.
- Concept testing: Unsure if a neon-lit pizza shoot will work? AI lets you experiment before buying props.
- Social media filler: Mix 1-2 AI images between real photos to keep feeds fresh (just label them clearly!).
The key? Keep AI as your assistant, not your replacement. Your audience can spot fake food—and nothing kills trust faster than a “homemade pie” that looks like it’s made of rubber.
Learn the Secrets of Food Styling (No Fancy Degree Needed)
Let’s cut through the Instagram-perfect illusion: Food styling isn’t magic—it’s mostly clever tricks and a little mischief.
The best part? You don’t need a culinary degree or a pro studio to make dishes look irresistible. Here’s the behind-the-scenes cheat sheet no one talks about.
The “Cheat” Tricks: What Pros Use
Have you ever wondered why restaurant ads make burgers look juicier than yours? Spoiler: They’re probably faking it. Here’s how you can too (shh—I won’t tell):
- Toothpicks are surprisingly handy. Prop up sagging sandwich layers, keep pancakes stacked tall, or even fake a “perfect bite” mark.
- Glycerin for fake condensation. Dab it on glasses or fruit to mimic fresh-out-the-fridge dew (water evaporates too fast under lights).
- Cotton ball smoke trick. Tuck a vaping device (or dry ice) behind food to add “steam” in photos—just don’t inhale near the salad.
Low-key genius hack: Use white glue instead of milk in cereal bowls. It won’t soak the flakes, and no one will know (unless they try to eat it—please don’t, you have been warned, lol).
How to Make Food Look Alive (Even When It’s Exhausted)
Food starts dying the second it’s plated. Here’s how to fight back:
- Grease is your friend. Brush oil on roasted veggies or meat to revive their “just-cooked” sheen.
- Iceberg lettuce armor. Line salad bowls with it to keep greens perky for hours (no one sees it underneath).
- The blowtorch trick. Lightly char cold pizza or grilled cheese edges to fake “fresh out the oven” vibes.
Pro tip for beverage photography: Drop a few soda bubbles onto a spoon and gently place them on your drink’s surface. Instant fizz—zero flatness.
Where to Practice for Free (No Fancy Clients Needed)
You don’t need a five-star kitchen to train like a pro. Steal these free playgrounds:
- Your fridge. Styling challenge: Make last night’s leftovers look gourmet with just tweezers and a napkin.
- Food blogs & TikTok. See behind-the-scenes secrets from top food bloggers & TikTokers on how they capture mouthwatering presentations that get all the likes (and maybe even go viral!).
- Grocery store “field trips.” Practice shooting in the produce aisle (natural lighting + vibrant colors = instant portfolio fodder).
Bonus: Team up with a friend who bakes or cooks. Offer free styling for their dishes in exchange for content—you both win.
Edit Like You Mean It (Without Overdoing It)
Editing can make or break your food photos. But there’s a fine line between “wow, that looks delicious” and “did this burger come from a cartoon?”
Here’s how to polish your pics without losing the soul of real food.
Free & Cheap Editing Tools That Won’t Embarrass You
You don’t need Photoshop to make your food pop. These tools are either free or cost less than your morning coffee:
- Lightroom Mobile (Free Version): The holy grail for subtle tweaks. Adjust shadows, warmth, and clarity without going overboard.
- Snapseed: Google’s hidden gem. The “Selective Adjust” tool lets you brighten just the avocado on your toast—not the whole plate.
- VSCO (Free Filters): Stick to natural presets like A6 or HB1. Avoid anything that turns your salad into a neon spaceship.
Pro move: Shoot in RAW if your phone/camera allows it. You’ll have way more editing flexibility later.
The #1 Mistake Newbies Make (It’s Not Overediting)
Surprise! The biggest flub isn’t slapping on too many filters—it’s ignoring white balance.
- Why it matters: Wrong white balance makes food look dead (blue-tinted pizza) or radioactive (orange soup).
- Fix it fast: In editing apps, tap the “WB” or “Temperature” slider. Adjust until whites (like napkins or plates) look neutral—not yellow or blue.
- Shoot smart: Avoid mixed lighting (e.g., window light + warm bulbs). It’s an editing nightmare.
Test it: Take the same photo under different lights and watch how the food “mood” changes. You’ll never ignore white balance again.
Build a Portfolio That Gets You Hired
Your portfolio isn’t just a collection of pretty food pics. It’s your silent salesperson, working 24/7 to land you paid gigs.
And the good thing is, you don’t need fancy clients or years of experience to build one that gets results.
Where to Host Your Work (Instagram? Blog? PDF?)
If you’re serious about How To Become a Food Blog Photographer, you need a home base that does the heavy lifting for you. Here’s the breakdown:
- Instagram is your business card. Great for discovery, but terrible for showing depth. Use it to tease your work, then link to…
- Your blog (the real MVP). A simple WordPress blog lets you:
- Showcase full projects (before/afters, behind-the-scenes)
- Rank on Google for local searches (“food photographer Austin”)
- Add client testimonials (even if they’re from your aunt’s bakery at first)
- PDFs for direct pitches. Some old-school clients still want this—keep a sleek PDF version ready to email.
Pro Tip: Start with a free theme blog with WordPress to test layouts, then upgrade when you land your first paid gig.
Curious about taking the first steps? Grab my FREE 7-day email course on starting your blog the right way below.
How to Fake a “Pro” Portfolio (When You’re Just Starting)
No one needs to know your “client” was your roommate’s homemade ramen. Here’s how to build a portfolio that looks legit:
- Shoot friends’ food for free. That latte art your barista buddy makes? Gold.
- Partner with local cafes/bakeries. Offer free shots in exchange for tagging you.
- Recreate viral food trends. TikTok’s latest pasta hack? Shoot it your way.
Low-Key Secret: Clients care more about consistent style than big names. Pick a vibe (moody, bright, rustic) and stick to it across 10-12 images.
What Clients Look For (Spoiler: It’s Not Just Skill)
Your dream client isn’t just hiring a photographer—they’re hiring a problem solver. Here’s what seals the deal:
- Reliability: Can you deliver on time, every time? (Show this with case studies.)
- Versatility: Can you shoot a greasy burger AND a delicate pastry? (Prove it in your portfolio.)
- Understanding their brand: A vegan cafe doesn’t want dark, meaty vibes. (Tailor your samples.)
Heads up: Ready to start your portfolio blog the right way? I’ve got a step-by-step guide here on choosing platforms, layouts, and must-have pages.
Monetize Like a Boss
Your food photos deserve more than just Instagram likes—they deserve to pay your bills. Forget the myth that only “established” photographers get paid.
Here’s exactly how to turn your shots into income streams, whether you’re holding a phone or a DSLR.
Direct Gigs: Landing Restaurant & Brand Shoots (Yes, as a Newbie)
Restaurants and small food brands need content constantly. The trick? Position yourself as the solution to their problem, not just “a photographer.”
- Start hyper-local:
- Cold email cafes with “I noticed your menu photos could use a refresh—here’s how I can help”
- Offer a free sample shoot for 1-2 dishes (then upsell the full menu)
Cold Email Template for Landing Restaurant Clients
Subject Line: Quick question about your menu photos

Hi [First Name],

I was checking out [Restaurant Name]’s [Instagram/website] and noticed your [specific dish/drinks] look delicious—but the photos aren’t doing them justice.

I help local restaurants like yours get more customers through mouthwatering images. Here’s what I can do:

• Shoot 3 free sample photos of your bestsellers (you can use them no-strings-attached)
• Deliver ready-to-post files in 48 hours
• Offer affordable packages if you love the results

Example of my work: [Link to 1-2 portfolio shots similar to their cuisine]

Would you be open to a quick chat this week? I’d love to hear your goals.

Best,
[Your Name]
[Your Blog]
[Phone Number]
- Package your services:
- “Social media packs” (3 hero shots + 5 detail shots for $X)
- “Seasonal menu updates” (shoot their summer specials annually)
Keyword tip: Optimize your blog for “food photographer for restaurants”—this long-tail phrase gets less competition but serious buyers.
Stock Photos: The Real Deal About Selling Your Shots
Stock sites won’t make you rich overnight, but they’re perfect for passive income. Focus on:
- Niche content (vegan desserts, rustic Italian dishes) that stands out
- Technical perfection:
- Shoot on clean backgrounds
- Leave copy space for text overlays
- Top-paying platforms:
- Stocksy (curated, high royalties)
- Alamy (good for editorial-style food)
- Your blog (sell directly via Pic-Time or ShootProof)
Hard truth: Generic “burger on plate” shots won’t sell. Think like a blogger—what images do recipe sites constantly need?
Blog Partnerships: Free Meals + Cash Collabs
Food bloggers and local spots will trade exposure for your skills. Structure it right:
- For restaurants:
- “I’ll shoot 3 dishes for social media in exchange for a feature + meal”
- Later, charge $X per additional dish
- For bloggers:
- Trade photos for backlinks to your portfolio
- Offer “first shoot free” to build relationships
Pro move: Create a media kit showing your rates and past collabs—it instantly makes you look pro.
Your Products: Beyond Client Work
The smartest food photographers diversify with:
- Lightroom presets: Sell your signature edit style ($15-50 per pack)
- E-books:
- “Food Photography Hacks for Bloggers”
- “Restaurant Social Media Image Guides”
- Online courses:
- Teach phone food photography on Udemy
- Offer 1:1 coaching for aspiring photographers
How To Become a Food Blog Photographer who earns? Start with one income stream, master it, then layer others.
“But How Do I Get My First Client?!”
That first paid gig feels impossible until it happens—then suddenly, everything clicks. Here’s exactly how to go from “no one knows me” to “when’s the shoot?” without sounding desperate or spammy.
The DM Trick: Cold-Pitching Restaurants Without the Cringe
Sliding into DMs works if you do it like this:
Engage first
- Like/comment on their last 3 posts (genuinely—”That burger sauce looks next-level!”)
- Wait 24 hours so they recognize your name
Send this script (adapt as needed):
"Hi [Restaurant Name] team! Your [specific dish] stopped me mid-scroll—it looks incredible. I’m a local food photographer helping restaurants like yours create images that make people click ‘order now.’ Would you be open to a free test shoot of your [signature dish]? No strings—just want to show what I can do for you."
Why it works:
- Specific praise (not generic)
- Free sample = no risk for them
- Local = easy logistics
Keyword bonus: Use “food photographer for restaurants” in your Instagram bio so they can find you later.
Networking Hacks That Don’t Feel Sleazy
Forget “hard selling”—build relationships instead:
- Facebook Groups:
- Join “Your City + Foodies” or “Restaurant Owners” groups
- Post: “Photographer here! Who needs fresh content for summer menu updates?” with 1-2 portfolio shots
- Food Events:
- Volunteer to shoot local food festivals (organizers often need photographers)
- Hand out simple cards: “Food Photographer | Menu Shots | Social Content” with QR code to your portfolio
- Collaborate with Food Bloggers:
- Trade free shots for tags/backlinks
- Their followers = your potential clients
When to Work for Free (And When to Run)
Do it IF:
✅ The free shoot gets you:
- A testimonial for your blog
- Usage rights to add to your portfolio
- A meal + ingredients covered
Never do it IF:
❌ They:
- Want full copyright ownership
- Won’t credit you
- A chain that can afford to pay
Pro move: Turn free work into paid—after the test shoot, send a pitch:
“Loved working with you! Here’s what a full menu shoot would look like: [Package details + pricing].”
Final Say – Your First Paycheck Starts Today
That slice of pizza on your phone right now? It could be your first paid gig. No magic, no luck—just the right next steps.
Here’s what to do right now:
- Pick one dish in your kitchen (yes, even leftovers)
- Shoot it 3 ways (overhead, 45-degree angle, close-up)
- Edit using the tricks we covered (white balance first!)
But here’s the secret no one tells you: The fastest way to get paid is to own your space online. That means starting your food photography blog today.
Why? Because:
- Blogs rank on Google (Instagram posts don’t)
- Clients take you seriously when you have a portfolio site
- You control your income (no waiting for DMs to convert)
I’ve put together the ultimate step-by-step guide to starting your blog—the right way. It covers:
✓ How to register your domain – Choose a name that attracts readers and builds your brand.
✓ Choosing the right hosting for serious bloggers – Learn why “cheap” can be expensive and select a hosting provider that supports your ambitions.
✓ Bulletproof WordPress security – Protect your hard work from hackers and sleep soundly knowing your blog is safe.
Start your food photography blog now – it takes 20 minutes, and it’s the single best thing you can do for your career.
Make a mental snapshot of this!
That “pro” you admire? They started exactly where you are now—with a camera, a dream, and probably some very sad first attempts. The difference? They didn’t wait for permission to begin.
Pin this image so you’ll always have these “how to become a food blog photographer” tips handy! Follow me on Pinterest for more ways to make money online.


