Last updated on 11th March, 2025 at 03:07 pm
Heads Up: For the sake of transparency, this post might contain affiliate links. If a sale is made, I will receive a small commission (at no additional charge for you), which helps keep the lights on and helps feed my cats. Please read our disclosure policy for more information.
This easy step-by-step tutorial will walk you through how to start a WordPress blog on Bluehost so you can start making money today.
Blogging has surged in recent years, thanks to its rewarding freelance nature.
Millions of blog posts are posted on different websites each day showing the true value of blogging in the internet age.
Other than the cash rewards (averaging to $ 100,000/month for top blogs) there is quite some freedom with blogging having you work in the comfort of whatever place you wish.
Additionally, a flexible schedule adds to why many people have chosen to blog. Everyone can generate some income with a blog without much need for hassle.
Hence, it’s worth paying for blog hosting with a guarantee that you will earn money back faster.
However, for most starters, finding the optimally cheap and good web host can be daunting following a market flooded with web hosts.
BlueHost is the perfect pocket-friendly web host to start a cheap WordPress blog. From as low as $2.95/month through this special link, BlueHost can help you start your blog.
Free 7-Day How to Start a Blog Email Course
Starting a blog could be a game-changer for you! My FREE 7-day email course spills the tea on everything you need to know: starting a blog, making money online, and the whole shebang! Sign up below to embark on your blogging journey! (no experience required!)
Related posts you may want to check out:
- How to Start a Crafting Blog That Actually Makes Money
- How To Choose A Profitable Blog Niche. (Bonus: 80 Niche Ideas)
- 9 Ways To Make Money Online During Lockdown.
- How to Make $100 A Day: 10 Creative Ways to Make Money
Why Bluehost is the Perfect WordPress Blog Hosting
While there are tons of web hosting services, BlueHost remains one of the most reputable among them. This follows tons of reasons that make it a great choice, especially for beginners in blogging.
Here are some of the compelling reasons why you need to choose Bluehost for your WordPress blog hosting;
- Ease of use! Whatever your skill level in all the blogging and hosting narratives, you can easily create a WordPress blog with BlueHost using the tutorial below.
- The steps are quite easy to follow, hence providing unmatched ease of use.
- They offer a guarantee in case you find it not optimal for your needs.
- BlueHost offers its customers technical support.
- Affordability is its key selling point. Notably, web hosting with BlueHost is quite cheap and extremely affordable. You can start it with up to $3.95/month
- Bluehost offers you a free blog domain
- Here, you will be self-hosted. Notably, if you wish to monetize your blog, you will wish to be self-hosted
- WordPress on BlueHost is free!
Some people may likely be thinking, “Wix has a free version! Why would I waste my money to pay for a hosting service?”
Read this properly. Do not start blogging using a free platform! Why?
The hosting company may simply delete your site without warning if they feel you are violating their terms; they might have limited capabilities and low monetization potential.
Resources: You can get more details on the blogging resources I used to help grow this blog by visiting my Resources & Tools page here.
How to Start a WordPress Blog on Bluehost
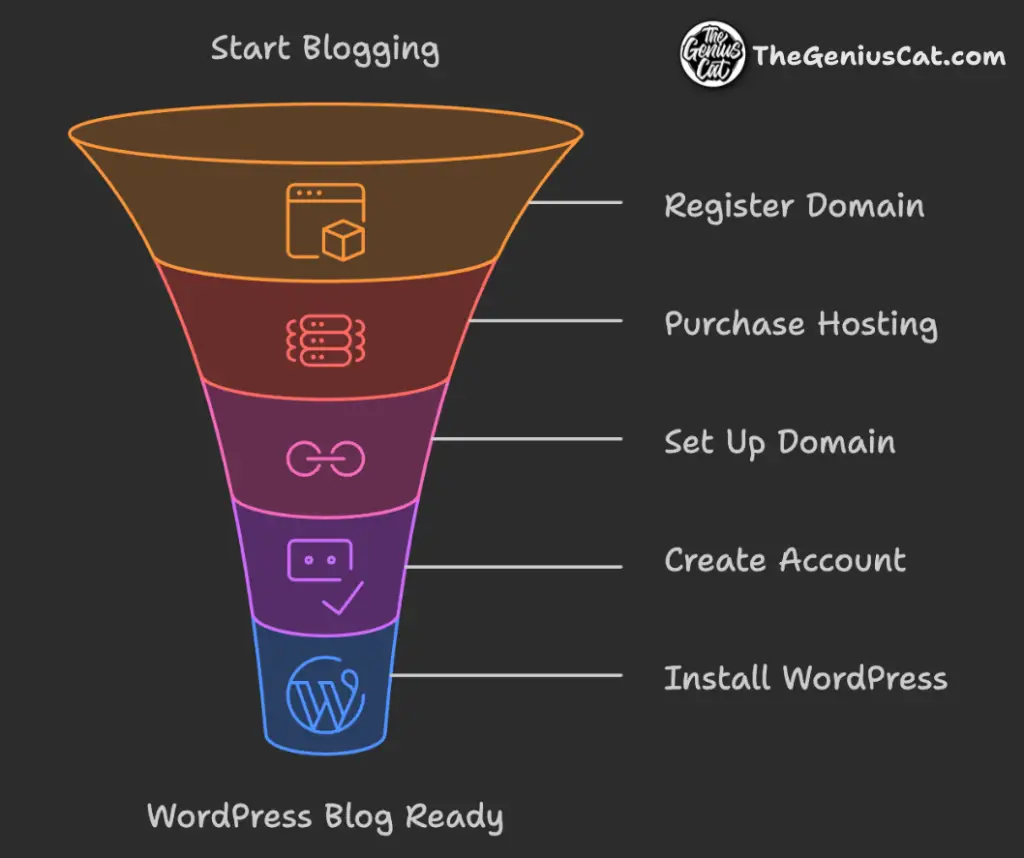
Step 1: Register your domain name
Once you are ready, the very first thing to do when starting a WordPress blog on BlueHost is to engineer a domain name. While it might look simple, creating a domain name can be tough and might require some extra attention.
You can get inspiration for your domain name from the very idea or theme of the blog or try out some good name that feels worthwhile.
With your domain name being such an integral part of your blog’s marketing strategy, you might opt for some professional help with purchasing domain names.
Tips for choosing a domain name:
- Easy to type
- Keep it short
- Use keywords
- Target your area
- Easy to pronounce
- Check if it’s not trademarked yet
- Use a domain name generator
If you wish to run a quick check to find out if your chosen domain name is available, you can do it right here:
Note: You MUST DISABLE AdBlock for the domain checker to show up!
Notably, you can acquire your domain through Bluehost in a direct and quite easy process. Using Bluehost for your domain name gifts you with a free domain for the first twelve months.
However, to get this offer, you will need to purchase twelve months’ worth of Bluehost web hosting. The offer makes signing up for at least twelve months of Bluehost web hosting services a worthwhile deal since it saves you money.
A cheaper deal is also available for those who commit to Bluehost web hosting for a 36-month plan.
Here, you note that your monthly pay rate for the services is quite low compared to the 12-month plan.
For those who decide on acquiring a free domain, just surge forth to the next step as you can purchase your hosting and be gifted with a free domain.
Step 2: Purchase hosting on Bluehost
It is an easier deal to set up your WordPress blog on Bluehost than you might imagine. But first, let’s talk about the cost.
For starters, the way to go by all means is to save every single penny you can to avoid unnecessary purchases.
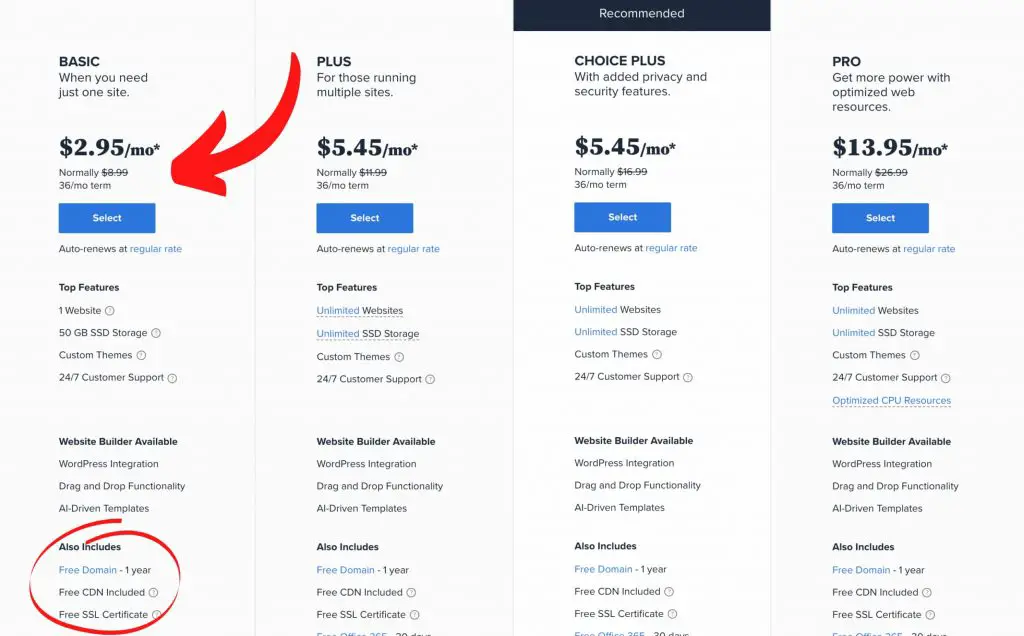
To obtain the cheapest price while starting a blog, choose the Basic plan.
When you sign up for 36 months at BlueHost with my special link, you will be priced at $2.95/month.
On the other hand, a 24-month plan will cost you up to $4.95/month, while the annual plan costs $5.95/month.
Choosing the twelve-month plan is quite affordable, especially with the free domain being offered.
Purchasing a 12-month plan equals spending just $71/year, which is by far an affordable and optimal price for web hosting.
With a free domain name coming along with this offer, you can be sure to save money.
The 36-month plan might sound great if you plan to blog for a long time. It has a low monthly rate, so you might get what you pay for.
All you need as a beginner in blogging is the Basic plan, which has you skip the expensive Plus and Business Pro plans.
Eventually, with your blog’s growth, you might need top-tier plans to benefit from everything they have to offer.
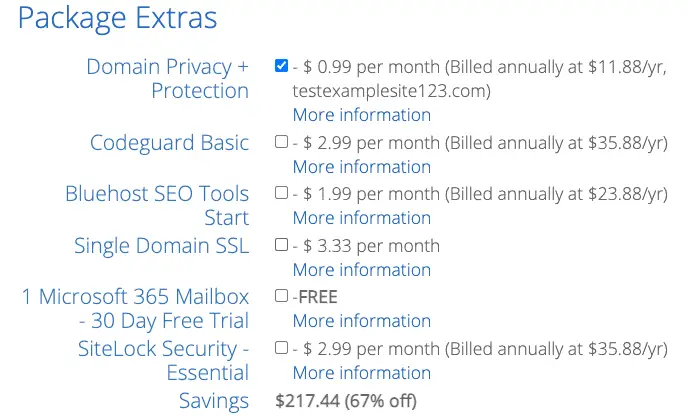
Additionally, you might need to pay for your Domain Privacy Protection. This should not worry you since it comes at a very low price of $0.99/month.
The protection it offers is quite impressive, especially given that it ensures the safety of your confidential information.
It is possible that you don’t need any of the additional services offered by Bluehost, so feel free to uncheck any extras.
I cannot emphasize enough why you might need to purchase at least a 36-month hosting plan.
Notably, paying monthly is quite ineffective and expensive.
When you subscribe to the 36-month deal, you will receive a free domain name and get a lower price for your web hosting. It’s a special discount for my readers.
Furthermore, you will put to an end to the hassle of dealing with an expired website each month. This ensures that you don’t lose traffic or visitors when your website is down.
On average, starting a WordPress blog with Bluehost will cost you $71/year or $142/3 years, which is a great deal to consider.
Purchasing a 36-month plan might work best if you have less to spend on hosting or when you are not sure about how profitable blogging can be.
Follow the following steps to purchase hosting when you are sure and ready to start a blog:
1. Navigate to Bluehost
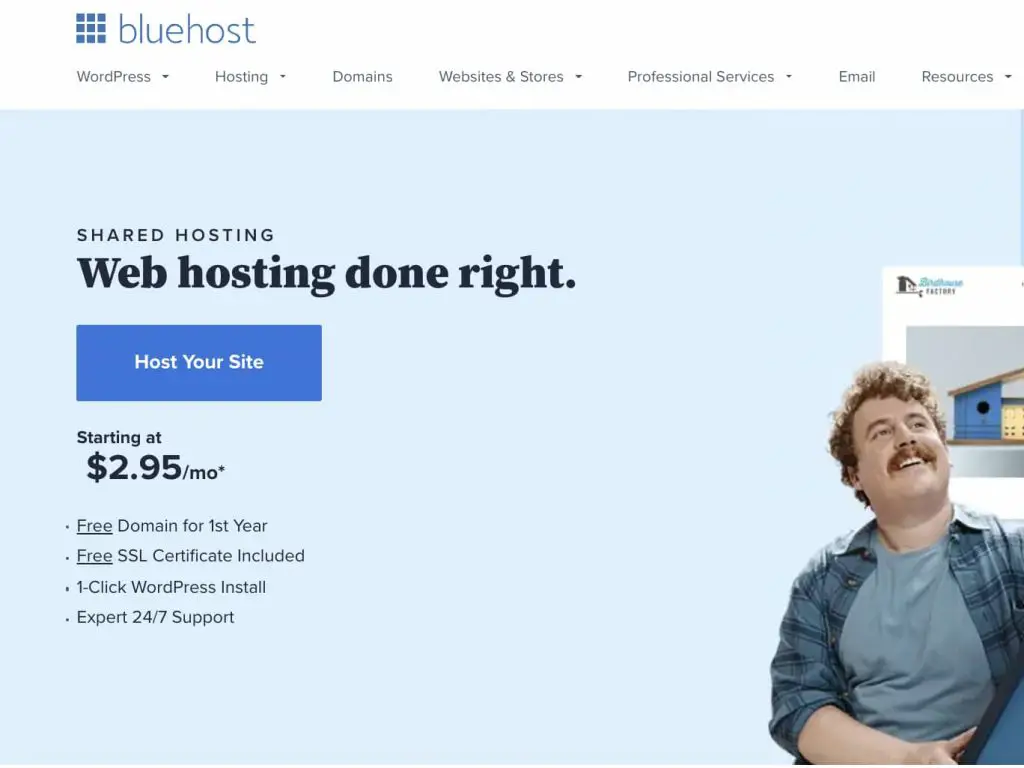
Click here to get a special $2.95/month on Bluehost.com, and click the “Host Your Site” button.
2. Select Your Package
Click to select the package that you find best for you. As I mentioned earlier, the best value would be the 36-month plan because it lowers the monthly fee over the 36 months and comes with a domain name free of charge.
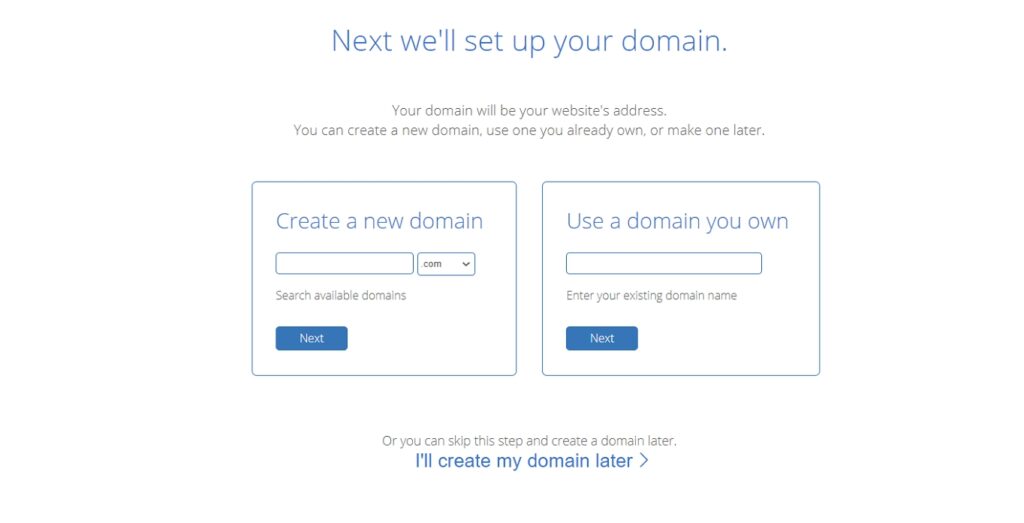
3. Set Up Your Domain
Create your domain name (or you can skip this step and create a domain later)
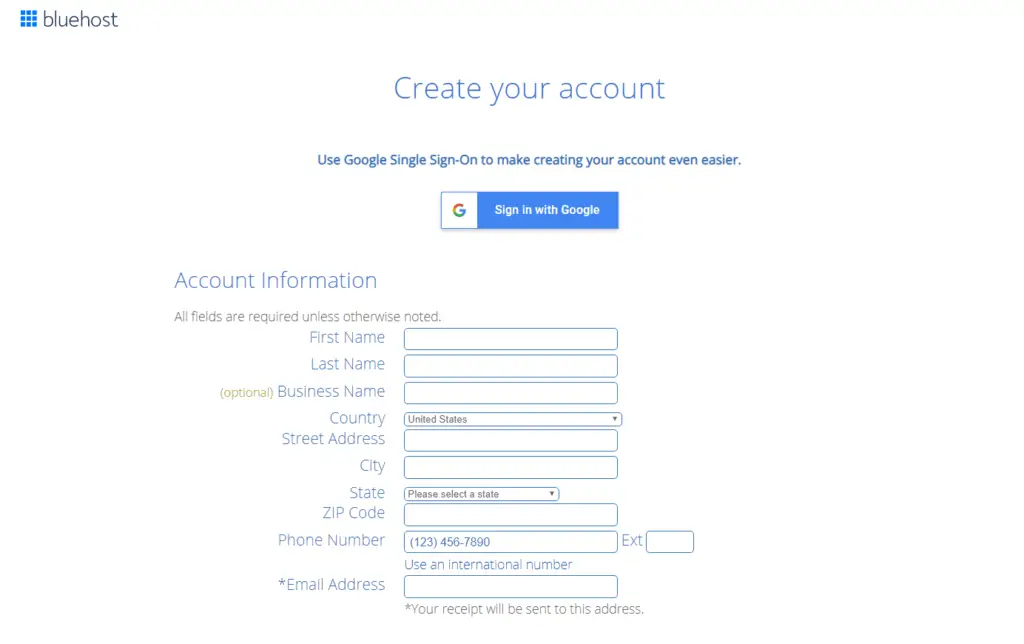
4. Create Your Account
Complete the account form with your contact information, your first and last names, and your place of residence.
5. Select Package Extras
As mentioned earlier, you may opt-in for Domain Privacy Protection and uncheck the extras. The extra cost is inconsequential when you’re just starting. Plus, you can change the features later if you want them.
6. Create Your Password
Enter a password (Using a strong password is recommendable. Use letters, numerals, and symbols for a strong password).
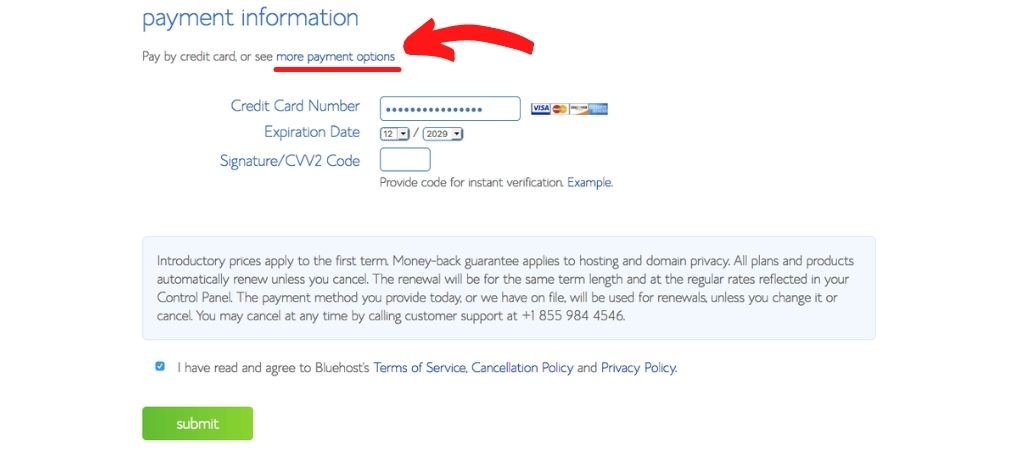
7. Select Your Payment Options
Payment Information: Paying with PayPal is an option for those who do not have or do not use a credit card. Just click on “more payment options”.
Step 3: Install WordPress on Bluehost
While installation of WordPress on Bluehost might seem like a mammoth process, it is rather FREE, simple, and easy to follow through.
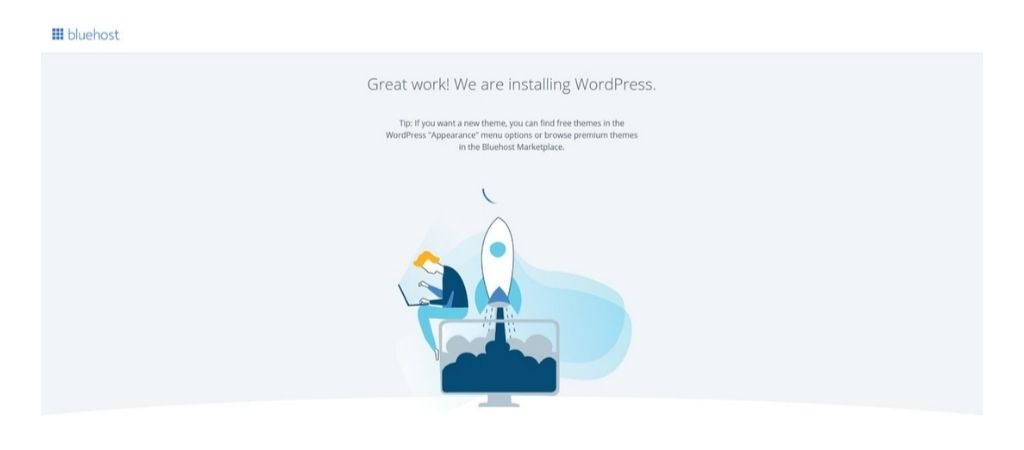
Notably, after creating your password, BlueHost offers you a guide that you can follow to help you start a blog. The process commences with BlueHost asking you to choose your most suitable theme.
You can choose any random theme or search for your preferred theme from what they have to offer.

Regardless of what you choose, you can alter it later. If it is quite a hassle for you, you can skip the step.
Now, you need to click on “Start Building”.

And on the next screen, you can opt-in for either “Personal” or “Business”. Otherwise, you can click on “I don’t need help!”
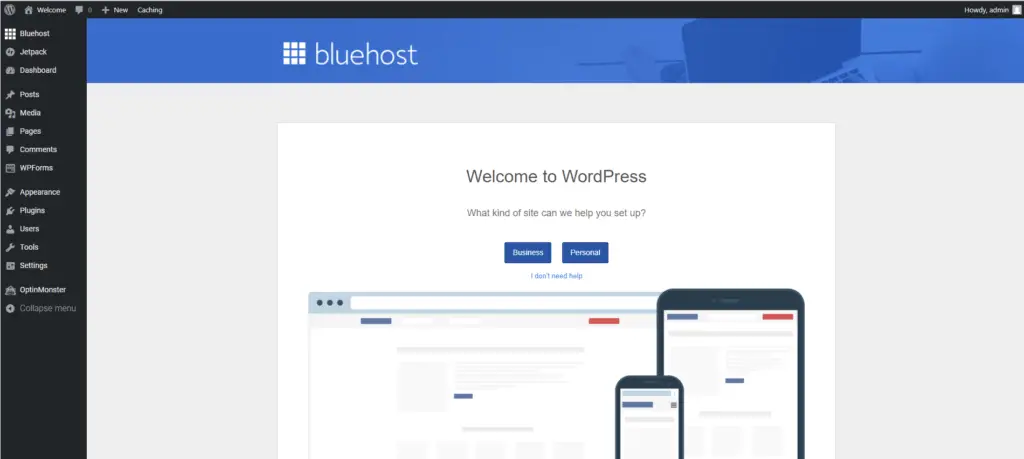
As simple as that, you now have a WordPress blog! However, you will need to work on the design as well as produce high-quality content for your blog to generate traffic and possibly profits.
Tips: Your WordPress dashboard can be accessed through the link below (remember to bookmark it):
https://yourblogname.com/wp-admin/
WordPress Security
Now that you have created your very own blog, it is time to delve into the most crucial topic: the security of your WordPress blog.
Let me share with you a glimpse of what could potentially happen to your blog if you choose to ignore it.

The fact that someone is trying to access your WordPress dashboard is a terrifying thought.
I find it unsettling that many hackers out there are attempting to hack (using a brute force attack) your blog.
This is why I wish to cover this topic in this post, as it is a vital step in preventing unauthorized access to your blog.
Honestly speaking, this was not something I was aware of when I first started my blog, and I have no idea what impact it can have if I don’t address it. I can assure you that most bloggers are not covering this matter in their “How To Start A Blog” posts.
So, let’s have a look at the following tips on how you can protect your blog, too.
1. Change your “admin” username
By default, WordPress will create this username for you to log in to the dashboard. I found that most of the new bloggers are unaware of the security implications and remain logging in with this “admin” username.
What’s the point of changing this “admin” username? I know you’re curious. Here’s why. First, hackers will attempt to hack into your blog using this username. Secondly, since they already know your username, they can now focus solely on hacking your password.
If you are still using admin as your username, no need to panic. It’s still possible to change it right now.
Follow the steps below:
- Log in to your WordPress dashboard and hover over Users >> Add New to create a new user account.

- Create a new username that is almost impossible for other people to guess.
- Fill out all the remaining details. Reminder: Make sure to use a different email address. Then select Administrator from the Role drop-down menu.
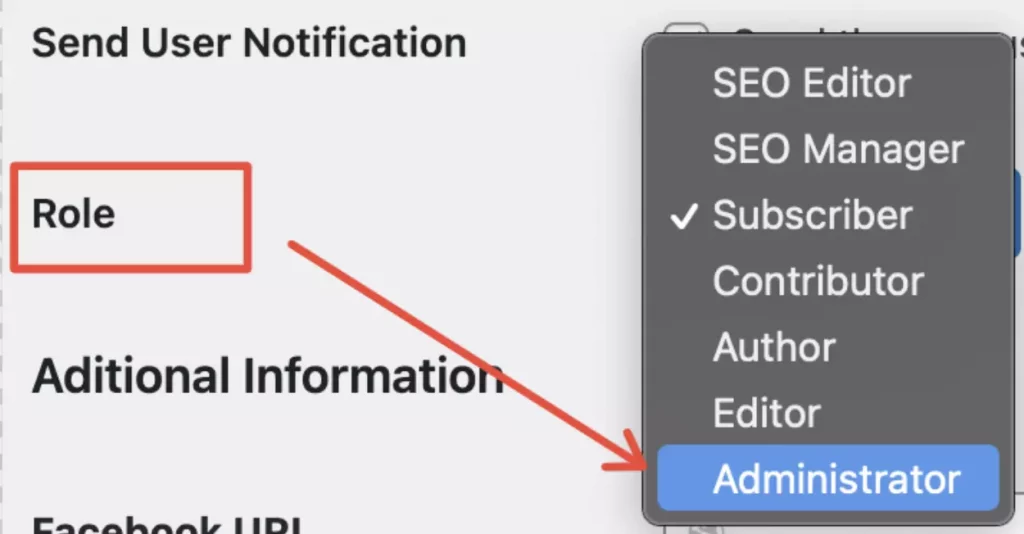
- Once done, click the “Add New User” button, and you will see the new user account you just created.
- Next, hover over “Howdy, Admin” at the top right and log out from your dashboard.
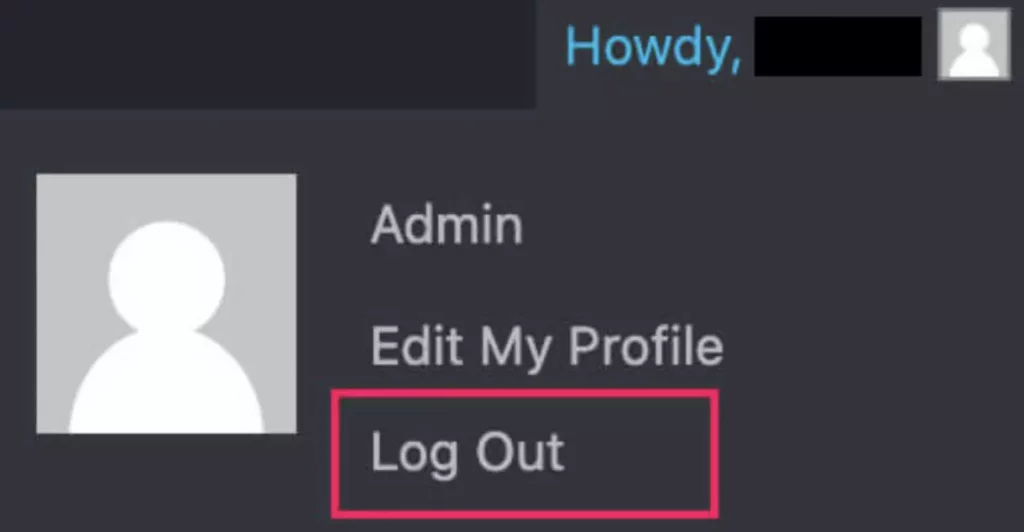
- Login with your new username and password.
- Then, hover over to Users again and delete your old admin account. Reminder: Before you delete, please ensure to back up your WordPress database first (just in case it goes haywire).
- Before you click on the final Delete button, select “Attribute all posts to (your new admin account)”. This is to assign your existing posts to your new admin user.
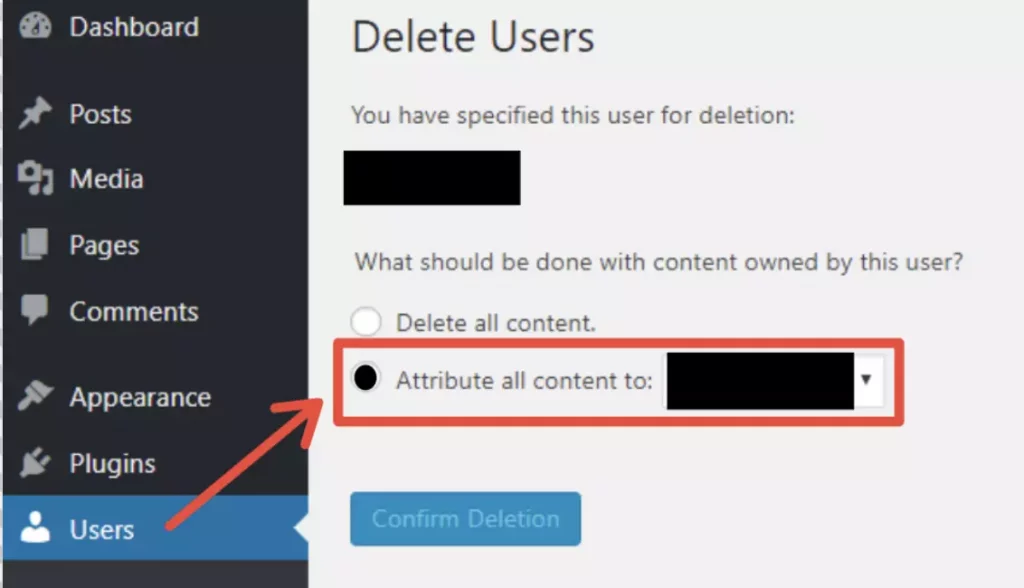
You’re done! You should now only be left with your new admin username, and all your existing posts will be associated with it.
2. Create a strong password
Creating a strong password for your WordPress login is an essential step in securing your website.
You’re probably using your name, last name, or another piece of information that isn’t as secure as your password. Bad idea. Your WordPress login should be at least 12 characters long with a mix of numbers, letters, and special characters.
Quick Tips: You can use a strong password generator provided by Digital.com in order to generate a secure and strong password.
3. Enable two-factor authentication
The password is the most common form of authentication for WordPress, but it’s not the best. Two-factor authentication (2FA) is a more secure way to protect your WordPress login by requiring something from you that only you know (your password) and something that only you have (a physical device).
In other words, your dashboard login will require you to enter your username and password as well as a time-based code sent to your smartphone.
A 2FA app like Google Authenticator can be used to generate a time-based code that changes every 30 seconds. If someone has your username and password, they still need access to your phone to log in to your account.
4. Limit login attempts
It’s important to implement security restrictions that limit login attempts. This will protect you from brute-force attacks and other forms of hacking.
You can install plugins like Limit Login Attempts or Login LockDown to do the job for you. Furthermore, you should disable the message that appears when a user’s username or password is invalid during a failed login attempt.
5. Enable reCAPTCHA
Captcha is an image verification tool that helps website owners protect against bots, spam, and abuse. With CAPTCHAs, users must enter a code that is shown in an image before they can log in and use the site.
Use Google reCAPTCHA v3 Service to enable it.
6. Install security plugins
WordPress is one of the most popular CMS systems in the world, but with popularity comes a greater risk of being hacked. Installing security plugins can help protect your site from hacking attempts, brute force login page attacks, and other malicious attacks.
Among recommended security plugins are Sucuri, Defender, Wordfence Security, iThemes Security, and many more.
7. Update your WordPress version
A WordPress version that is outdated is a common target of hackers. Therefore, it is wise to keep your WordPress version updated. Regularly checking for updates and installing them as soon as possible will help to eliminate vulnerabilities found in the previous, older version.
You must back up your site first. In case the most recent update does not work with your site yet, you can at least revert to the previous version based on the backup you created.
8. Update to the latest PHP version
You’ll usually be notified if there is a new PHP upgrade. If you don’t feel comfortable carrying out these updates yourself, I would strongly suggest you contact the support team of your web hosting provider and ask them to assist you.
Wrap Up
While blogging is a great way to earn cash, you might need to optimize the cost of running a blog website.
Having a reliable and cost-effective web host like BlueHost is the first step to starting a WordPress blog.
Notably, the steps mentioned are straightforward to follow.
You can now seek your financial freedom by making blog posts.
BlueHost is, therefore, a great web hosting companion for all your WordPress blog needs, having it beat most of the web hosting services in the competition.
If you require assistance at any stage, please do not hesitate to contact me. It would be my pleasure to assist you.
Check out my resource page here for more information on the blogging tools I rely on to grow my blog.
Let me know in the comments below if you have any doubts. Please share this article with others if you find it worthwhile.
Hope you enjoyed going through my step-by-step tutorial on how to start a WordPress blog on Bluehost.
If this blog post added a sprinkle of joy to your day, why not spread the love? Share it with your pals, and let the good vibes flow! Plus, follow me on Pinterest for more gems like this.

